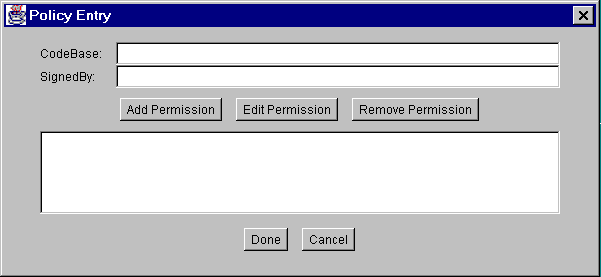
To grant theWriteFileapplet permission to create and to write to thewritetestfile, you must create a policy entry granting this permission. To create a new entry, click on the Add Policy Entry button in the main Policy Tool window. This displays the Policy Entry dialog box as shown in the following figure.
This figure has been reduced to fit on the page.
Click the image to view it at its natural size.A policy entry specifies one or more permissions for code from a particular code source - code from a particular location (URL), code signed by a particular entity, or both.
The CodeBase and the SignedBy text boxes specify which code you want to grant the permission(s) you will be adding in the file.
- A CodeBase value indicates the code source location; you grant the permission(s) to code from that location. An empty CodeBase entry signifies "any code" -- it does not matter where the code originates.
- A SignedBy value indicates the alias for a certificate stored in a keystore. The public key within that certificate is used to verify the digital signature on the code. You grant permission to code signed by the private key corresponding to the public key in the keystore entry specified by the alias. The SignedBy entry is optional; omitting it signifies "any signer" -- it does not matter whether the code is signed, or by whom.
If you have both a CodeBase and a SignedBy entry, the permission(s) are granted only to code that is both from the specified location and signed by the named alias.
To grant
WriteFilethe permission it needs, you can grant permission to all code from the location (URL) whereWriteFile.classis stored.Type the following URL into the CodeBase text box of the Policy Entry dialog box:
Note: This is a URL. Therefore, it must always use slashes as separators, not backslashes.http://java.sun.com/docs/books/tutorial/security/tour1/examples/Leave the SignedBy text box blank, since you aren't requiring the code to be signed.
Note: To grant the permission to any code (.classfile) not just from the directory specified previously but from thesecuritydirectory and its subdirectories, type the following URL into the CodeBase box:http://java.sun.com/docs/books/tutorial/security/-You have specified where the code comes from (the CodeBase), and that the code does not have to be signed (since there is no SignedBy value). Now you are ready to grant permissions to that code.
Click on the Add Permission button to display the Permissions dialog box.
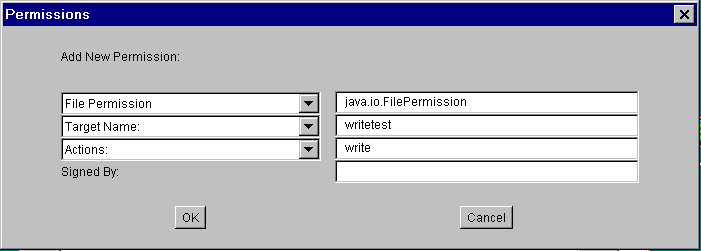
Follow these steps to grant code from the specified CodeBase permission to write (and thus also to create) the file named
This figure has been reduced to fit on the page.
Click the image to view it at its natural size.writetest.The Permissions dialog box now looks like the following.
- Choose File Permission from the Permission drop-down list. The complete permission type name (
java.io.FilePermission) now displays in the text box to the right of the drop-down list.
- Type the following in the text box to the right of the list labeled Target Name to specify the file named
writetest:writetest- Specify write access by choosing the
writeoption from the Actions drop-down list.
This figure has been reduced to fit on the page.
Click the image to view it at its natural size.Click on the OK button. The new permission displays in a line in the Policy Entry dialog. So now the policy entry window looks like this.
This figure has been reduced to fit on the page.
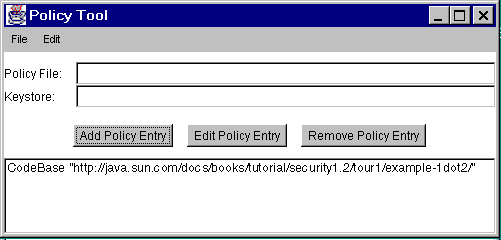
Click the image to view it at its natural size.You have now specified this policy entry, so click on the Done button in the Policy Entry dialog. The Policy Tool window now contains a line representing the policy entry, showing the
CodeBasevalue.
This figure has been reduced to fit on the page.
Click the image to view it at its natural size.


