It's time to write your first application! The following instructions are for users of Windows XP Professional, Windows XP Home, Windows Server 2003, Windows 2000 Professional, and Windows Vista. Instructions for other platforms are in "Hello World!" for Solaris OS and Linux and "Hello World!" for Mac OS X.
A Checklist

To write your first program, you'll need:
- The Java SE Development Kit 6 (JDK 6)
You can download the Windows version now. (Make sure you download the JDK, not the JRE.) Consult the installation instructions.
- A text editor
In this example, we'll use Notepad, a simple editor included with the Windows platforms. You can easily adapt these instructions if you use a different text editor.
These two items are all you'll need to write your first application.
Creating Your First Application
Your first application,
HelloWorldApp, will simply display the greeting "Hello world!". To create this program, you will:
- Create a source file
A source file contains code, written in the Java programming language, that you and other programmers can understand. You can use any text editor to create and edit source files.
- Compile the source file into a .class file
The Java programming language compiler (
javac) takes your source file and translates its text into instructions that the Java virtual machine can understand. The instructions contained within this file are known as bytecodes.
- Run the program
The Java application launcher tool (
java) uses the Java virtual machine to run your application.
Create a Source File
To create a source file, you have two options:
- You can save the file
on your computer and avoid a lot of typing. Then, you can go straight to Compile the Source File into aHelloWorldApp.java.classFile.
- Or, you can use the following (longer) instructions.
First, start your editor. You can launch the Notepad editor from the Start menu by selecting Programs > Accessories > Notepad. In a new document, type in the following code:
/**
 * The HelloWorldApp class implements an application that
 * simply prints "Hello World!" to standard output.
 */
class HelloWorldApp {
    public static void main(String[] args) {
        System.out.println("Hello World!"); // Display the string.
    }
}
Be Careful When You Type 
Type all code, commands, and file names exactly as shown. Both the compiler (
javac) and launcher tool (java) are case-sensitive, so you must capitalize consistently.
HelloWorldApphelloworldapp
Save the code in a file with the name
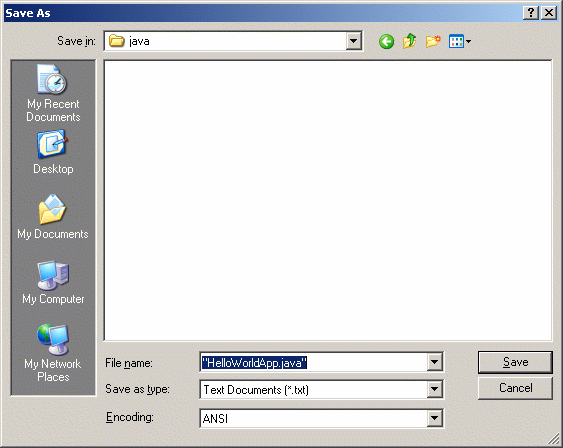
HelloWorldApp.java. To do this in Notepad, first choose the File > Save As menu item. Then, in the Save As dialog box:When you're finished, the dialog box should look like this.
- Using the Save in combo box, specify the folder (directory) where you'll save your file. In this example, the directory is
javaon theCdrive.- In the File name text field, type
"HelloWorldApp.java", including the quotation marks.- From the Save as type combo box, choose Text Documents (*.txt).
- In the Encoding combo box, leave the encoding as ANSI.
The Save As dialog just before you click Save.
Now click Save, and exit Notepad.
top
Compile the Source File into a .class File
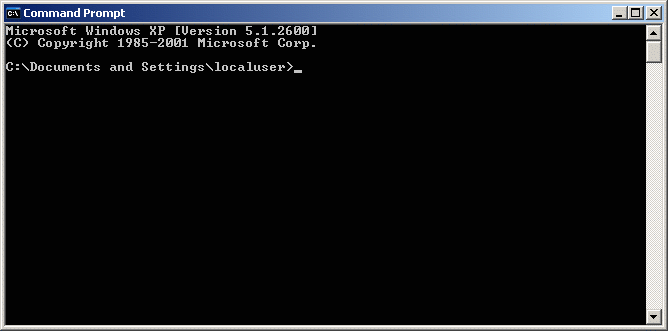
Bring up a shell, or "command," window. You can do this from the Start menu by choosing Command Prompt (Windows XP), or by choosing Run... and then entering
cmd. The shell window should look similar to the following figure.
A shell window.
The prompt shows your current directory. When you bring up the prompt, your current directory is usually your home directory for Windows XP (as shown in the preceding figure).
To compile your source file, change your current directory to the directory where your file is located. For example, if your source directory is
javaon theCdrive, type the following command at the prompt and press Enter:cd C:\javaNow the prompt should change to
C:\java>.
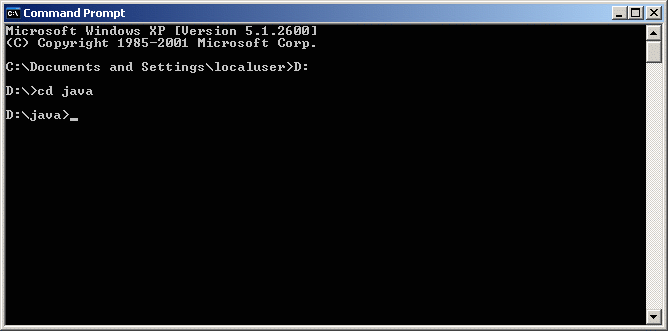
Note: To change to a directory on a different drive, you must type an extra command: the name of the drive. For example, to change to thejavadirectory on theDdrive, you must enterD:, as shown in the following figure.
Changing directory on an alternate drive.
If you enter
dirat the prompt, you should see your source file, as the following figure shows.
Directory listing showing the
.javasource file.Now you are ready to compile. At the prompt, type the following command and press Enter.
javac HelloWorldApp.javaThe compiler has generated a bytecode file,
HelloWorldApp.class. At the prompt, typedirto see the new file that was generated, as shown in the following figure.
Directory listing, showing the generated
.classfileNow that you have a
.classfile, you can run your program.top
Run the Program
In the same directory, enter the following command at the prompt:java HelloWorldAppThe next figure shows what you should now see:
The program prints "Hello World!" to the screen.
Congratulations! Your program works!
top


